


Hello buzzdies! I bet, most of you have heard enough about Pomodoro Technique, a time management method. In case you haven’t, lemme explain.
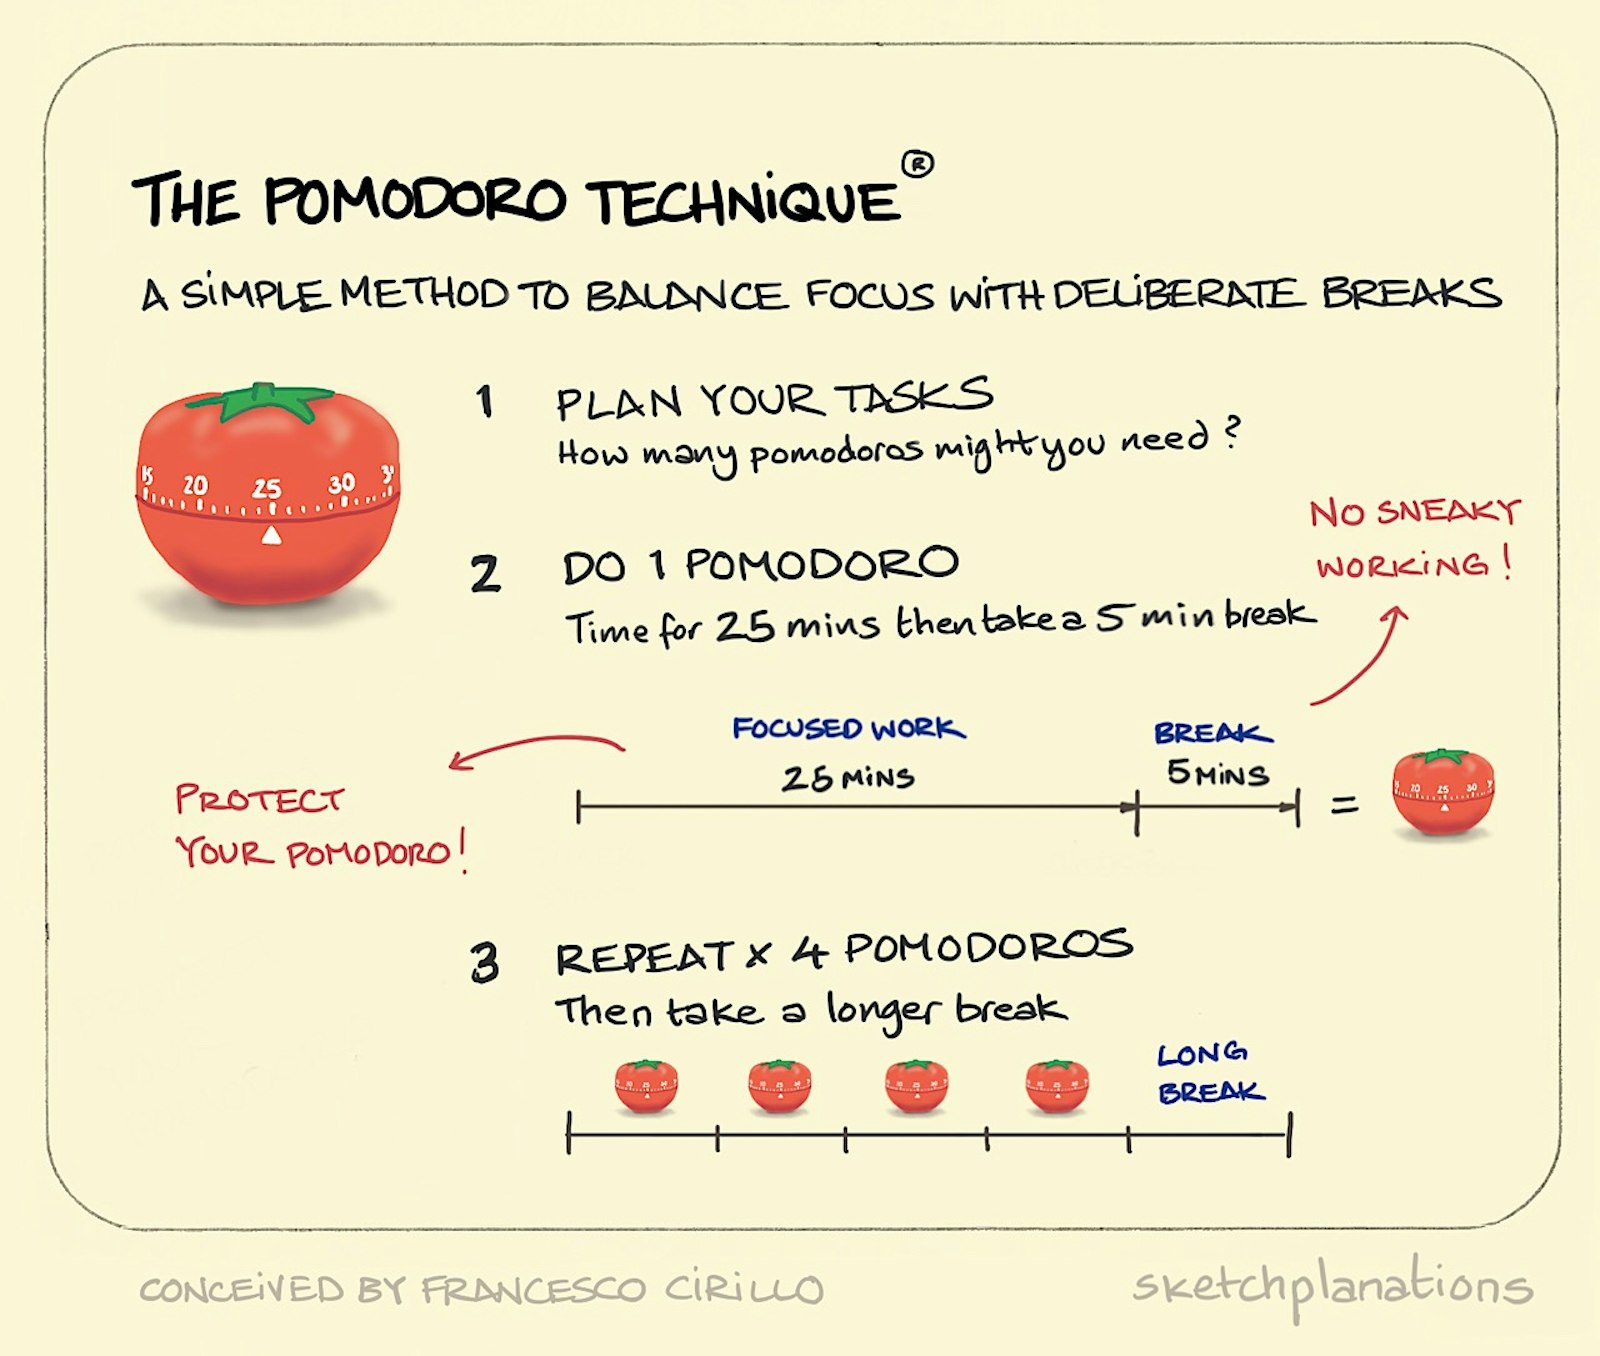
The Pomodoro technique is invented by Francesco Cirillo, around the 1980s. It encourages people to work with the time they have—rather than against it. Using this method, you break your workday into 25-minute chunks separated by five-minute breaks. These intervals are referred to as “Pomodoro”. The diagram below explains it further.
Source: https://sketchplanations.com/
This technique is for everyone, including programmers and developers as well. But working according to Pomodoro using a regular clock or alarms is very disturbing so it’s always better to have some software. And it’s much better if we can develop the software ourselves!
Yup, you got the point. This tutorial is on how to make a Pomodoro Application using Python, with User Interface. Move on 😉
In case you're in a hurry, the source code can be found in this GitHub repository. Open for PRs!
Getting Started
First, we should import the libraries— math for calculations and tkinter for GUI. Since these are pre-installed, we can import them directly.
From tkinter import *
Import math
Basic UI
Interesting part first, let’s build the user interface.
Defining Global Constants
When working GUI, it’s a good practice to define global constants for properties like Color, Font types and sizes and etc. The following code does the job.
PINK = "#f81365"
RED = "#e7305b"
GREEN = "#9bdeac"
GRAY = "#EFEFEF"
FONT_NAME = "Barlow Condensed"
Setting Up
We’re going to use an ordinary Tkinter window, size 100 x 50. And the constant variables we declared in the previous part are used here.
window = Tk()
window.title("Pomodoro")
window.config(padx=100, pady=50, bg=GRAY)
title_label = Label(text="Timer", fg=PINK, bg=GRAY, font=("Barlow Condensed", 50))
title_label.grid(column=1, row=0)
canvas = Canvas(width=200, height=224, bg=GRAY, highlightthickness=0)
# highlightthicknes is used for making the highlight disappear
tomato_img = PhotoImage(file="tomato.png")# use your path
canvas.create_image(100, 100, image=tomato_img)
timer_text = canvas.create_text(100, 110, text="00:00", fill="black", font=("Barlow Condensed", 35, "bold"))
canvas.grid(column=1, row=1)
# count_down(5)
# x and y values are half of the width and the height
start_button = Button(text="Start", highlightthickness=0, command=start_timer, bg=PINK, font=("Barlow Condensed", 10))
start_button.grid(column=0, row=2)
reset_button = Button(text="Reset", highlightthickness=0, command = reset_timer, bg=PINK, font=("Barlow Condensed", 10))
reset_button.grid(column=2, row=2)

check_marks = Label(text="✓", fg=GREEN, bg=GRAY)
check_marks.grid(column=1, row=3)


window.mainloop()
You may have seen that we used an Image of a Tomato in the above code. The image can be downloaded from the GitHub repository
Don’t hurry to test this code as it’s not ready yet! There are some functions and variables which aren’t been declared yet. So its time to move to the next part,
Declaring Functions
First, we will finish the logical part. Here, we need three major functions. reset_timerstart_timercountdown
Let’s start with the Reset function. But before that, we need to declare some more values as global constants, like below:
WORK_MIN = 25
SHORT_BREAK_MIN = 5
LONG_BREAK_MIN = 20
reps = 0
timer = None
Note: the valuereps is used for governing the timing section of work and breaks and counting them. Done!
reset_timer
In this function, we need to do to following things: Reset the timer text to 00:00 Cancel the timer Reset reps to 0 Delete the checkmark(used for counting no: of working time sections) We use the following code to do all of these.
def reset_timer():
   window.after_cancel(timer)
   canvas.itemconfig(timer_text, text="00:00")
   title_label.config(text="Timer")
   check_marks.config(text="")
   global reps
   reps = 0
Awesome! Now let’s move to the next part.
start_timer
Compared to the Reset function, the Start function is somewhat lengthy as it does some more tasks, such as below: Add +1 to reps the variable Defining Long breaks and Short breaks. Converting minutes to seconds
The following code can do all the above:
def start_timer():
   global reps
   reps += 1
   work_sec = WORK_MIN * 60
   short_break_sec = SHORT_BREAK_MIN * 60
   long_break_sec = LONG_BREAK_MIN * 60

   if reps % 8 == 0:     # If it's the 8th rep
       count_down(long_break_sec)
       title_label.config(text="Break", fg=RED)

   elif reps % 2 == 0:     # If it's the 2nd/4th/6th rep
       count_down(short_break_sec)
       title_label.config(text="Break", fg=PINK)

   else:
       count_down(work_sec)
       title_label.config(text="Work", fg=PINK)
Awesome! But we’re not ready yet, we have to write another function for counting down.
count_down
In this function, we need to do the following tasks: Count down and change the text accordingly. Put check marks for each work session.
Here’s the code we can use for these purposes.
def count_down(count):
   count_min = math.floor(count / 60)
   count_sec = count % 60

   if count_sec < 10:
       count_sec = f"0{count_sec}"
   canvas.itemconfig(timer_text, text=f"{count_min}:{count_sec}")
   if count > 0:
       global timer
       timer = window.after(1000, count_down, count - 1)
   else:
       start_timer()
       marks = ""
       work_sessions = math.floor(reps/2)
       for _ in range(work_sessions):
           marks += "✓"
       check_marks.config(text=marks)
Awesome! Believe it or not, we’re done with our Pomodoro Application. Here're some screenshots how what it looks like:
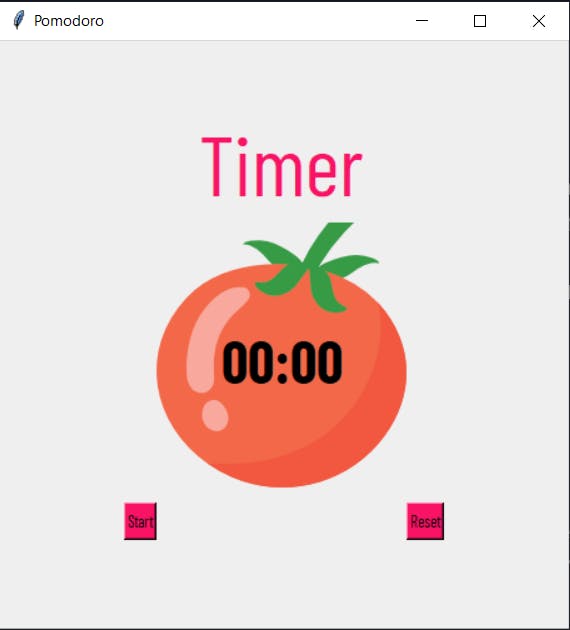
Default Window
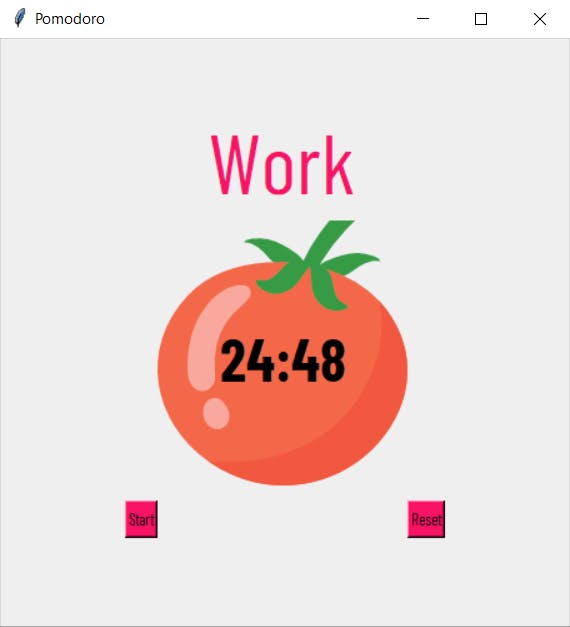
Running...
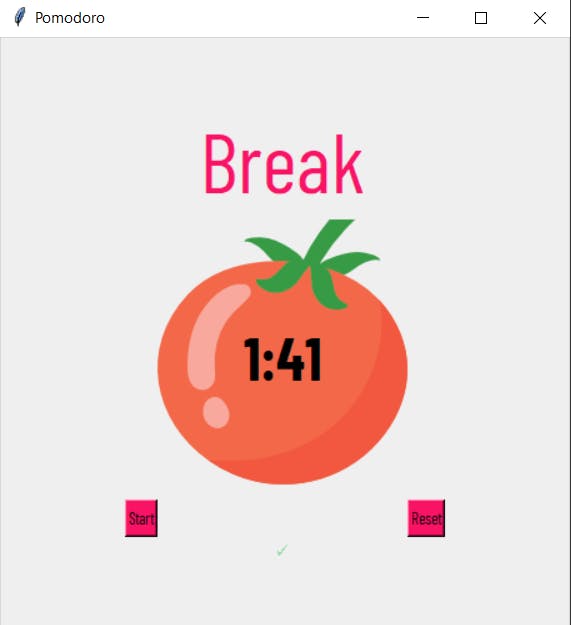
On break...
Summary
In this short tutorial, we created an awesome-looking and simple Pomodoro application which can boost your productivity at work. The source code can be found in below GitHub repository,
Don’t forget to fork, star, and contribute! And also if you have any questions or feedback, drop them in the comments.
Happy Coding!
_____________________________________________________________________________________